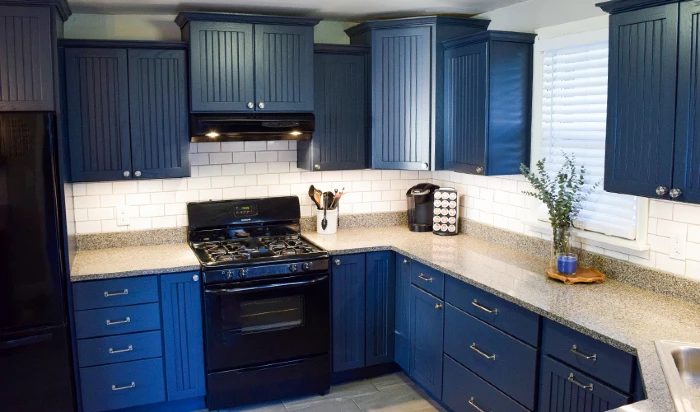
How to Update Your Kitchen Cabinets in Your Favorite Style
Are you inspired to spruce up your kitchen? Updating the kitchen cabinets can be a budget-friendly way to transform the entire space. From painting to antiquing to adding crown molding, there are many choices to make. Where to begin? Here are a few different methods for giving your cabinets a fresh look.

How to Paint Kitchen Cabinets
Before you pull out your paintbrush, learn the kinds of primer and paint that are right for your cabinets. For example, laminate cabinets require a special bonding primer, while metal cabinets need a coat of metal primer for best results. You can purchase paint designed especially for cabinets, but most high-quality acrylic, latex-based paint will work well.
Cabinet painting tips:
- Choose paint with a satin or semi-gloss finish; these are easier to clean than flat-finish paints and do not show as many mistakes or dings as gloss-finish paints.
- Always check the paint can label to read the manufacturer’s instructions.
- Set aside several days for your painting project, and open the windows to ventilate the area.
- If your cabinets are currently painted, determine whether the paint is in good enough condition for you to paint over, or if it would be better to strip the paint before you begin.
- Apply paint with a brush and roller. Or, if you have the right skills, using a paint sprayer may provide the smoothest finish.
- If you aren’t up for DIY cabinet painting, find out if there’s a Five Star Painting team near you to save time and hassle and ensure a beautiful result.
How to Antique Kitchen Cabinets
Antiquing, also known as distressing, is a method of giving cabinets a worn, rustic appearance. This style works well in a farmhouse-style or shabby chic home. The process involves applying a dark glaze or stain to a lighter-painted door. Many homeowners find antiquing is one of the easier ways of updating cabinets because it requires minimal time and supplies.
Cabinet antiquing tips:
- Avoid very dark colors for the base paint because the antique effect doesn’t show as well on them.
- White-painted or natural-stained wood cabinets are great canvases for this project.
- Choose a stain product advertised for antiquing purposes; it will have the right color, opacity and luster to create an authentic look.
- The higher the contrast between the cabinet base color and stain, the more vintage and aged the cabinets will appear.
- If you happen to make a mess during the antiquing process and are dealing with paint stains on clothes or fabric, the trustworthy experts at Molly Maid have a stain removal guide to help.
How to Refinish Kitchen Cabinets
Refinishing your kitchen cabinets is the closest thing to getting new cabinets without the expense of starting from scratch. If you plan to strip the cabinets to the original wood prior to refinishing, which we recommend, purchase enough liquid stripper and sandpaper to get the job done.
Cabinet refinishing tips:
- Remove hardware before applying any products to the cabinets.
- Plan to spend significant time removing existing paint and stain from the cabinets; it is important to remove as much finish as possible before priming and staining.
- Use a wood filler or putty to fill any scratches or dents, and then sand all cabinet surfaces thoroughly.
- Seal the surface with a wood conditioner that promotes a smooth stain application.
- When you are ready to begin staining, use a soft, cotton rag or a brush to apply the product evenly and consistently.
- The final touch is the polyurethane varnish – a clear, protective coat that protects your cabinets from wear and tear and deepens the wood’s color. Be sure to apply the varnish in a dust-free environment to prevent dust particles from adhering to the surface.
More Tips for Transforming Your Kitchen Cabinets
While painting, antiquing or refinishing the kitchen cabinets can go a long way toward rejuvenating the space, there’s more you can do. To take your kitchen upgrade to the next level without blowing your budget, consider making these additional changes:
- Install glass cabinet door panels to create an attractive, customized look. Whether you want to replace all of the cabinet panels or only a few, the experts at Glass Doctor share their tips for adding glass to your kitchen cabinet doors.
- Update the cabinet hardware. This single step can make a surprisingly dramatic visual impact in kitchens.
- Add trim or crown molding to give the cabinets dimension. Is this DIY task outside of your comfort zone? If locally available, Mr. Handyman is an excellent handyman service provider to choose.
- Consider refacing the cabinets if you don’t like the doors.
- Install task lighting, also known as under-cabinet lighting, to illuminate the countertop and your kitchen workspace. Rather than trying to figure out electrical work on your own, set your project up for success (and safety!) by hiring a dependable team like Mr. Electric.
- Remove cabinet doors for an open cabinet concept. This on-trend kitchen update is easy on the wallet and something you can tackle in an afternoon.
What’s Next for You?
As you ponder the possibilities for updating your kitchen cabinets, you may discover your heart is set on custom-built cabinetry to give your kitchen a new start. We recommend seeing if Mr. Handyman has a location nearby. Their experts can customize gorgeous cabinets to enhance the beauty and functionality of your space.
If you decide to go full speed ahead with your kitchen cabinet project, remember that the Neighborly home service professionals are always here to help. We’ve already mentioned, above, some of the reliable Neighborly brands that are ready to put their expertise to work for you. Those aren’t the only ones! Search for any home service you need here.


 Back
Back
 1 (855) 217-8437


